Homemade Holiday Gifts
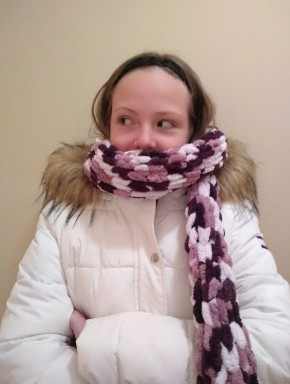
My 7th grade sister, Julia Burkholder, poses in a scarf made of Loop Yarn.
December 8, 2019
Although these gifts look impressive, they are inexpensive and easy to make. No artistic talent is required!
“Knitted” Super Soft Scarf
Made with Loop Yarn, this scarf is as fuzzy as a baby blanket and has the look of knitting – without the needles or the difficulty.
Cost: About $6, depending on the brand of yarn
Time: 1 hour
What you will need: Loop Yarn, such as Loop De Loops, Lion Brand Off the Hook or Red Heart Loop-It
Scissors
Instructions:
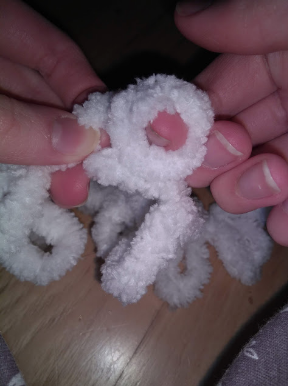
- Lay out a flat strand of the yarn 8-10 loops wide. This will determine how wide your scarf will be. Don’t worry if there is extra yarn without loops on the end. Place it so that the yarn that is attached to the ball is on the right.
- Zig-zag the yarn so that there are two rows of the same amount of loops.
- Pull the right-most loop from the upper row through the right-most loop from the lower row, coming from behind. The next loop on the upper row should be pulled through the back of the next loop. Repeat that with each loop, making sure that each upper loop is pulled through from behind. You should not be knitting together any loops from the same row.Pull the loop from the next row through the corresponding loop from the previous row. Make sure to push from behind.
- Zig-zag the yarn the other way. Pull the left-most loop from the upper row through the left-most loop from the lower row. Pull through each loop as you did before. Repeat until you reach the length you would like.
- Once you reach the desired length, cut the yarn with a few inches left on the end.
- To finish off the scarf, take the loop farthest away from the yarn “tail” and pull the loop next to it through it. Repeat until you reach the end of the scarf, then cut the extra yarn. Cut the loops off of the yarn and pull it through the last loop.
- If you have any extra pieces of yarn dangling from the sides of the scarf, weave it through the stitches in an in-and-out pattern. If there are still loops on the end of your extra yarn, make sure to cut the loops off before weaving in the ends.
If you would like to alternate colors in your scarf, use a multi-colored yarn or buy multiple colors and switch off. To do this, stop with one color and leave a few inches of a tail. Do not finish off the scarf; instead, pick up where you left off looping the yarn with the new color.
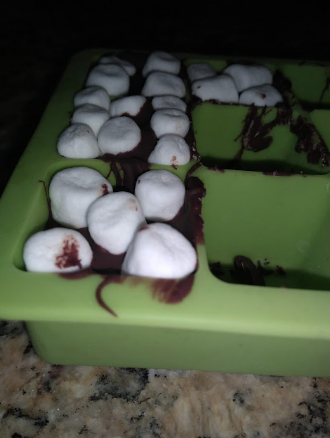
Hot Chocolate Cubes
When placed in hot milk, these cubes create hot chocolate.
Cost: About $10 for multiple uses
Time: 10 active minutes, 1 hour of cooling time
What you will need: Chocolate chips (the better the quality, the better the hot chocolate), silicone ice cube tray, microwave-safe bowl, toppings
Instructions:
- Melt chocolate chips in a microwave-safe bowl in 30-second intervals. Stir after each interval until smoothly melted.
- Pour melted chocolate into each section of the silicone ice cube tray. Press in toppings such as marshmallows, crushed candy canes, or caramels.
- Place into the freezer until hardened, about an hour.
- Let thaw for ten minutes, then pop cubes out of the ice cube tray.
To serve, stir into 8 oz. hot milk.
For extra flavor, mix cinnamon into the melted chocolate chips before pouring.
Mini Calendar
This calendar requires only a printer and a stapler to complete. It is perfect for lockers.
Cost: cost of paper
Time: 1 hour
What you will need: A computer, printer, paper, glue stick, and a stapler
Instructions:
- Pick 13 landscape-oriented photos for the calendar, one for each month and one cover photo.
- Create a Google Doc. Go to File> Page Setup. Change all margins to 0.3 inches.
- Insert the photo, click on it, and change it to “wrap text.”
- Click the top of the page next to the photo and hit enter until you are 25 enters down the page. Type a lowercase L. This will show where the middle of the page is. Crop and stretch the photo accordingly so that it does not move past the L.
- Copy and paste in a calendar for the needed month. I found mine on wiki-calendar.com. Size accordingly and make sure it is on “wrap text.” Center both images.
- In the row with the L, erase the letter and instead type a few dashes in order to show where to fold the calendar. Make sure to check that it is on the 25th line.
- Repeat for each month.
- Create a cover for the calendar by placing an image on the lower half of the page (after the 25th line) and placing a dashed line on the 25th line.
- Print and fold each on the dashed line.
- Glue together the backs of the cover picture and the picture for January. The glue the calendar page for January with the picture for February, the calendar page for February with the picture for March, and so on. Let dry.
- Lay all pages flat with June on top. Staple along the middle line.
- Fold the calendar and let sit under a heavy book for half an hour to crease.
- Add little doodles, washi tape, or glitter, or write in important dates for the person who will receive the gift.
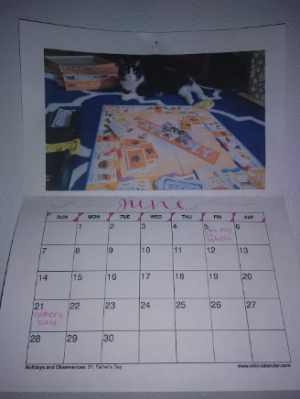
Cropping out the title of the month and writing it instead adds a nice touch.