As the Christmas season rolls around once again, familiar and nostalgic Christmas traditions start to show themselves in homes around town: trees begin to pop up inside windows, lights adorn roofs and yards, and the smell of Christmas baking fills kitchens. There is nothing like a good Christmas cookie to bring back memories and fill the house with Christmas spirit. Out of the many scrumptious variations, one of the most beloved is the gingerbread cookie. Gingerbread houses are well-known as a delicious and beautiful combination of baking and art. While it may be a challenging undertaking, building a gingerbread house is a perfect way to enjoy Christmas for those who love to be creative with their cookie-making and would like to attempt something a little more advanced.
Local chef and baker Simeon Blust, a 12-year-old who has a passion for creating novel masterpieces in the kitchen, has created his own recipe for the perfect gingerbread house. With a workable consistency of batter that bakes to be firm and strong, an exploding flavor of ginger with hints of cloves, nutmeg, and cinnamon, and of course, the necessary lavish amounts of butter that make everything taste better, Simeon’s recipe is the perfect formula for a functional and delicious gingerbread house. His plan for the structure leaves nothing to be desired, resulting in a full-size house complete with a chimney, an extruding front section and a small door for happy gingerbread men to use as they please. Below is Simeon’s full recipe, complete with helpful photos to provide visual explanations and expert baking tips from the chef himself.
Ingredients
- For the gingerbread:
- 4 sticks salted butter, softened
- 1 cup brown sugar
- ¾ cup molasses
- 3 eggs
- 6½ cups of flour
- 2 tablespoons and 1 teaspoon ground ginger
- 2½ teaspoons nutmeg
- 4 teaspoons cinnamon
- 1 teaspoon baking soda
- 2 teaspoons vanilla extract
- For the glue frosting:
- 4 egg whites
- 6 cups powdered sugar
- ½ teaspoon cream of tartar
- For the decorative frosting:
- 5 cups powdered sugar
- 8 ounces cream cheese
- 1½ teaspoons vanilla extract
- And of course, lots and lots of candy! (ex. M&Ms, Dots, etc.)
Step One: Remove 4 sticks of butter from the fridge several hours before you plan to start making the batter, allowing them to soften completely. This will help the batter reach the desired consistency. If you use unsalted butter, you will have to add a teaspoon of salt to the dry ingredients in a future step.
Sim’s pro tip: If you sometimes forget to plan ahead, put the oven on proof (85 degrees Fahrenheit) and put the butter inside on an oven-safe plate for about half an hour or until soft. Using a microwave is more difficult because it heats unevenly.
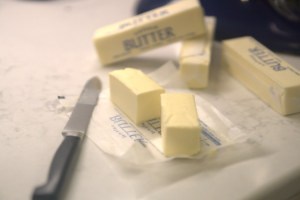
Step Two: Cream the butter in a stand mixer on high until light and fluffy, about two minutes. If you don’t have a stand mixer, you will get a good arm workout, but it is still possible to get the butter to the right whipped consistency.

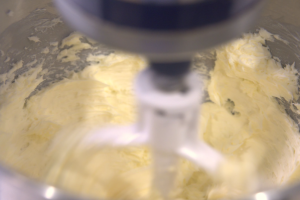
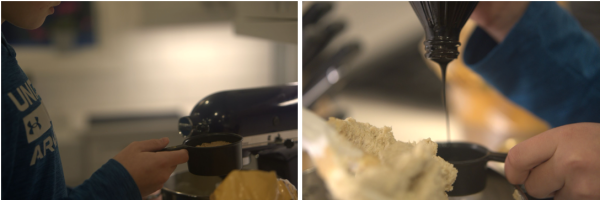
Step Three: Add in the molasses and brown sugar, mixing thoroughly.
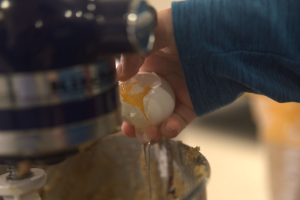
Step Four: Next, add the three eggs to the mixer. Be sure to crack them carefully and avoid getting any eggshell bits in the batter!
Sim’s pro tip: It’s fine if the batter seems wet and gooey because it will even out when you add the flour.
Step Five: With the wet ingredients done, it’s time to mix the dry ingredients. Sift the dry ingredients using a strainer or sifter into a large bowl – this is crucial to creating an evenly mixed, consistent batter without any clumps.
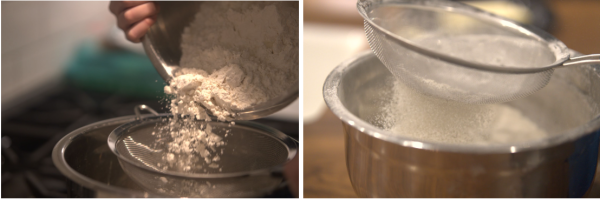
Step Six: Repeat this process with each of the spices: ginger, nutmeg, cloves and cinnamon, and then with the baking soda, mixing thoroughly with a whisk after each addition.
Sim’s pro tip: Be extra careful to avoid clumps in the baking soda, because bits of baking soda taste bad in the final product.

Step Seven: Now, it’s time to combine the wet and the dry ingredients. Pour the flour mixture into the mixer that holds the wet ingredients, with the mixer on a low setting. Mix until the flour is almost fully mixed in but not quite, being careful not to overmix.
Sim’s pro tip: Add the flour mixture gradually, as that will prevent clumps forming and flour flying out of the mixer.
Step Eight: Dump the dough out of the mixer onto a smooth, clean surface. Don’t worry if it’s lumpy and sticky, that is how it’s supposed to feel! Mix in any flour that hasn’t been fully mixed, and knead the dough gently with your hands until it becomes smooth and cohesive.
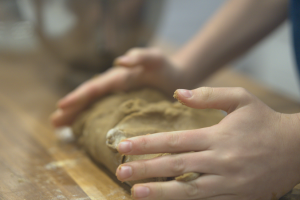
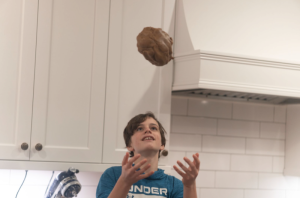
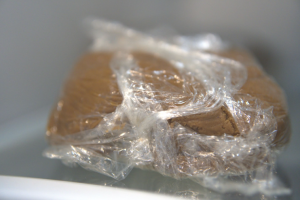
Step Nine: Divide the dough into three or four sections and wrap each in plastic wrap. Then, place them in the fridge to harden for at least 2 hours and up to a day.
Sim’s pro tip: If you’re in a time crunch, stick the dough in the freezer. This won’t be as gradual of a cooling, but it should still do the job! Once it’s been about 30 minutes, transfer it to the fridge. You don’t want it rock solid, but it should be quite firm.
Step Ten: While you’re waiting for the dough to harden, print out the attached shapes (at the bottom of the article) for the sections of the gingerbread house and cut them out carefully. You’ll use these to trace the correct dimensions onto the dough.
Sim’s pro tip: If you happen to have a laminator, laminate the pieces and cut them out again. Laminated pieces are much easier to work with because they don’t stick to the dough as much and they are washable. Plus, you can save them for next year and use them again!
Step Eleven: Once the dough is firm, take one piece out of the fridge and place it on a floured surface. Flour is important in this step because the dough tends to stick to the roller as it starts to warm up. Roll the dough out so that it is an even thickness of about ¼ inch.
Sim’s pro tip: Only take one piece out at a time, and put any bits of dough you aren’t using into the freezer. Dough warms up quickly and it can be difficult to cut pieces accurately when the dough is soft and moldable.
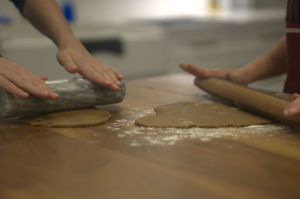
Step Twelve: Lay out the pieces of paper you have cut onto the dough and use a butter knife, plastic scraper, or some similar tool to carefully cut them into the gingerbread dough. Move each piece to a baking sheet covered with parchment paper (or, if you do not have parchment paper, grease well or spray with cooking spray). Some important notes: the ‘little front’ should be cut out of the ‘big front,’ and the door should be cut out of the ‘little front’. Now is the time to add windows or any other creative touches you would like (for example, Simeon added windows on the sides and on the door). And finally, there should be a good amount of extra dough – feel free to make some gingerbread men!
Sim’s pro tip: Cut out the big pieces (roof, sides, front) first, because the dough is most firm when it has just come out of the fridge. The big pieces tend to stretch when they’re moved to the baking sheet if the dough is too soft, and this messes up the dimensions.
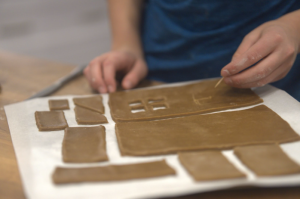

Step Thirteen: Once you have cut all the pieces, place them in the oven at 350 degrees Fahrenheit and let them bake for about twenty minutes. At that point, take them out and check for firmness. They will continue to harden as they cool, but they should look slightly darker and feel fully baked.
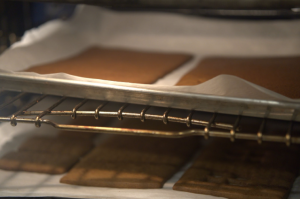
Step Fourteen: While the gingerbread bakes, make the frosting. There are two types of frosting that must be made for the construction of the house. The first is the glue frosting that will stick together the sides. Like most recipes for glue frosting, Simeon’s recipe calls for egg whites. These egg whites will not be cooked, and it’s important to consider that while most often the risk of eating raw eggs comes from the yolk, there is a slight risk involved with consuming raw egg whites. Additionally, using egg whites means the gingerbread house will need to be stored in a fridge. They definitely make the frosting a more effective glue, but it’s possible to create a glue with only powdered sugar and water.
In order to make Simeon’s glue frosting, add the egg whites and cream of tartar into an electric mixer and beat until foamy. Then, add in the powdered sugar and mix until combined. Store in the fridge until ready for use.
For the decorative frosting, beat together cream cheese, powdered sugar, and vanilla extract until fluffy and whipped.
Step Fifteen: After taking the gingerbread out of the oven, let it cool FULLY. It can be hard to wait, but the gingerbread is hardest and strongest when it is fully cooled down.
Sim’s pro tip: Transfer the gingerbread to a cooling rack so it has air flow underneath it. This will allow it to cool faster.
Step Sixteen: Now it is time to construct! Constructing a gingerbread house can be a challenging process, but remember, slow and steady wins the race. It is easy to crack the pieces and hard to glue them together, so be careful and work slowly. Start by gluing both sides to the back of the gingerbread house. When it’s starting to harden, add the front to complete the base. Then, put the whole creation in the fridge to harden the frosting.
Sim’s pro tip: Sometimes, less is more. If you use too much frosting, it doesn’t dry as fast, making it difficult for things to stay together. With a well-placed strip of frosting that isn’t too thick, the joint will be strong and will still dry quickly.

Step Seventeen: Once the frosting is hard, add one of the two roof segments to the base, and then add the other. Then, put that whole structure in the fridge and allow it to harden.
Sim’s pro tip: Use small blocks, like Keva blocks, to hold up the roof while it dries. Without some support, the roof is likely to slide down and fall before it can fully dry.

Step Eighteen: Next, put together the front section of the house, adding the ‘little sides’ onto the ‘little front’. Allow this to harden in the fridge as well. While waiting for the roof and little front to harden, construct the chimney separately by gluing together all four pieces.
Sim’s pro tip: While lying things down can make them easier to put together, you have to be careful not to glue anything to the surface you’re working on. Parchment paper is a good choice because frosting peels off easily.
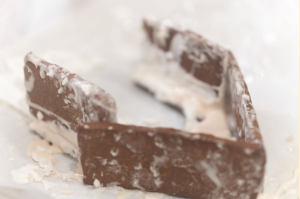
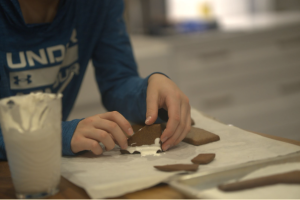
Step Nineteen: When everything is firm and dry, attach the ‘little front’ to the main house, and glue on the ‘little roofs’. Glue the chimney on top. Give all of this a good hour to harden in the fridge to ensure that any pressure applied when decorating won’t break anything.

Step Twenty: And finally, the moment we’ve all been waiting for! It’s time to decorate. This is the fun part, so be creative and access that artsy side of you that has been waiting to come out. Use the cream cheese frosting to stick your favorite candies to the roof and sides, turning a simple gingerbread house into a beautiful one.
Sim’s pro tip: Use the cream cheese frosting to fill in any gaps and touch up the glue frosting. The pieces rise in different ways in the oven, and often things don’t fit quite the way they were supposed to. This is the time to fix that!
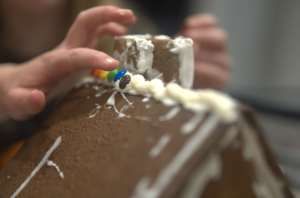
And you’ve done it! A beautiful gingerbread house to admire and enjoy. Christmas is the perfect time to get into a big project like this, bringing everyone from the family together to create something wonderful. Simeon hopes you’ve enjoyed his recipe, and maybe he’ll bring more delicious treats to the Cardinal Chronicle in the future!
Gingerbread House Parts Template


